|
|
CARA 2.1/2.2 Plus - Auralization Overview
The Quick Steps
CARA is not limited by the ability to only tell you about the room setup you currently have. It will go further to tell you what a better setup would look and sound like. Positional Optimization is the name given for the procedure that moves you, the listener, and your loudspeakers to find the best listening combination. Auralization is the step in which CARA analyzes the layout of your Loudspeakers in relation to the listener and other factors of your listening room. Before beginning this tutorial it is important to have a "rough draft" of your listening room. You may want to consider building two designs of your room. A more involved one for fine-tuning your layout, and a simplified design to be able to do quick changes and calculations.
I have built an example room in CARACAD which contains only two pieces of furniture (my entertainment center and a couch). I have setup the wall types and the floor type, but have left all other wall treatments (windows, pictures, doors, etc..) out of the equation. Less stuff means faster calculation times. For my speaker setup, I decided to just do a Stereo setup and I picked a pair of speakers out of the pre-made speakers included with CARA. I started out with the speakers on the floor and facing straight forward.
|
|
|
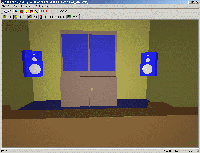
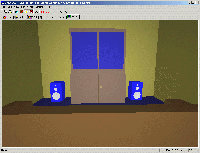
Here is the 3D view of my layout. Notice that my speakers are on the floor, and that they are pushed back against the wall. I wonder how CARA will move my speakers to improve the sound quality?
|
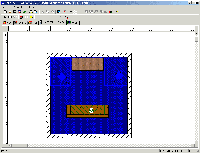
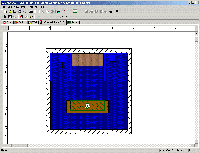
This is the layout view of my room under the "Speakers and Listener" tab. Here is where I add in my Listener and my speakers. Notice how I drew the boxes around my speaker and listener quite wide. This is how I tell CARA that these are the LIMITS of where the listener and speakers can be placed. Right-Clicking on the speakers also lets me set the Z-coordinate limits. (How high or how low the speakers will be allowed to be.)
|
|
|
|
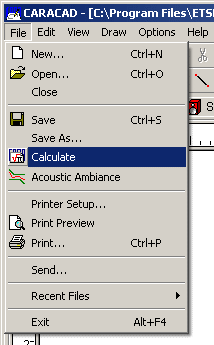
Now that I have my design all ready I need to send my CAD design over to CARACALC. I do this by going to File->Calculations. Make sure you have your design saved before going to CARACALC.
|
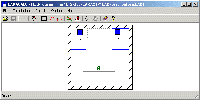
Here is what my design looks like in the CARACALC program. The dashed gray lines represent the borders of objects that are in my room layout. The speakers are blue, and are surrounded by the blue guidelines that represent the limits I had set in CARACAD. These are the limits of movement that the Positional Optimization Calculator will have to work with. The green box represents the limits I have set forth for my listener position.
|
The CARACALC portion of CARA is where all the magic happens. In this tutorial we are only going to focus on two of the calculations that CARACALC is capable of. The Positional Optimizer is the calculation that tests each speaker position by "moving" the speakers and the listener. It only moves them within the limits you set forth in your CARACAD design, though. It is important to set forth useable boundaries and to consider what these boundaries are saying about how your room design may change. The Auralization is the way that you can see and hear the difference that the positional optimizer can make. For my example, I started with a relatively bad setup. My stereo speakers are facing forward (not pointed towards my listening position) and are sitting on the floor of the room. I did this so I could see the best solution possible with a very wide array of possibilities (Should I get stands for my speakers? does direction change sound quality? should I move my couch?). Now, the positional optimizer wont go and move the couch for you but, with a little tinkering on the computer, you can save yourself hours of moving heavy objects and re-wiring speakers.
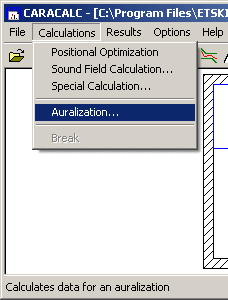
Creating data and viewing data are two steps in CARACALC. We can't view data that doesn't exist. Therefore, we must do the calculation before we can begin to see any graphs, or hear any changes. In CARACALC we must do this by going to the Calculations menu. There we can select our calculation.
|
|
|
This is the menu for the Auralization Calculation. Once you have selected auralization, a new window will open. Just click Start to begin the process. It shouldn't take long to do this process.
|
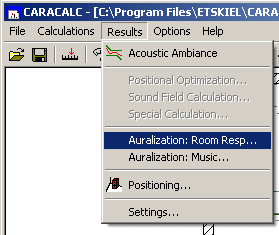
Once my calculation has finished, I can go to the results menu to take a look at what the calculations can tell me. Notice that the other results are grayed out. This is because I haven't performed those calculations yet.
|
|
|
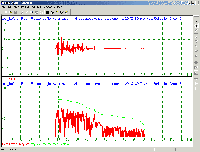
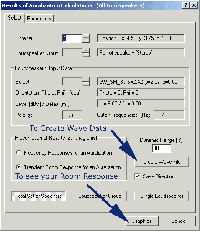
This is the results window for the Auralization calculation that I have just done on my current layout. In this window I can see various things about the current acoustic status of my room. For the procedures that we are going through in this tutorial we only need to focus in on two buttons. The first button is the Graphics Button. This button opens up a window with graphs that will show you the room response of your current layout. I recommend printing that graph out before you make any further changes to your layout. This will allow you to actually see what changes are taking place between changes. The other button that we need to focus on is the "Create Wave File" button. This is where we create a wave file that contains the Room Response information. This is not a wave file that you can play, it is merely how the data about your room is stored. In our next step we will create the wave file that you can listen to.
|

|
|
|
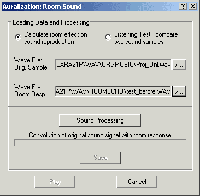
To start the process of creating the example .wav file, based on your room layout, we need to go to Results->Auralization: Music. A window will open which will ask for the input .wav file (the music that you would like to play). CARA comes with a good example file, with a good dynamic range, so that you can pick out the difference quite easily. It will also ask for the file we just created in the Auralization: Room Response step.
|
The first line is asking for your input file (music). The second wants your room response file (room data). Click Sound Processing, and wait for it to finish. Click Save to output the file to your hard drive. Make sure you put it in a safe place, and, give it a name that will keep it discernable from others you may make. I suggest keeping all the data from each change you make, so you can get an idea of what works, and what doesn't.
|
Now that we have the data for our before CARA setup, lets get down to the Positional Optimization.
|
|
|
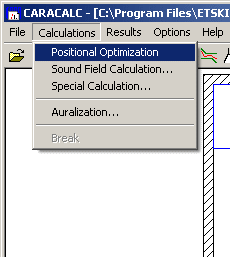
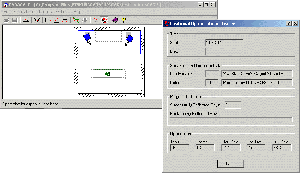
In order to start the Positional Optimization go to Calculations->Positional Optimization. A window will pop up, just hit start.
|
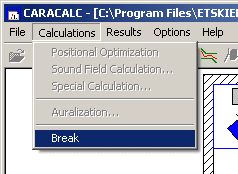
If you move the window out of the way of the CARACALC window, you can watch as the Optimizer tries different positions. Keep an eye on the Optima on the Optimizer window. This is telling you the level of optimum setup that has been reached. If it sits on one number for say, 300 calculations, you should break the optimizing calculation.
|
|
Now that you've gone through and had CARA make the changes, you should go take a look at what has actually changed. Take a look at the Graph for the Auralization and compare the room response for each layout. Also, make another wave file for the new layout, compare it to your previous layout. If you are happy with the changes, now is when you go back into CARACAD and get the dimensions for where everything should be. Make sure you pay attention to not only the x and y coordinates for your speakers, but, also the z coordinates. My speakers were moved from the floor to a position of 84cm. Just right-click on a speaker to see its properties. You can apply this technique for all your layouts, and it can help you get more out of your sound system, without even moving anything.
Before
After
The Quick Steps
To Create a Sound Example:
Start CARACALC and open your CAD design.
Run an Auralization - Calculations->Auralization.
Create a Auralization Room Response Wave - Results->Auralization:Room Resp... Click Create Wave File.
Create your Sound Example - Results->Auralization:Music.. Load your music (wave file). Load your Room Response Wave.
Start Processing
Save your generated music.
To Optimize your Room Setup :
Start CARACALC and open your CAD design.
Start the Positional Optimizer - Calculations->Positional Optimizer.
Start the Calculations.
When you feel that you have reached the best optimum you can get (no change after several hundred calculations) Break the Calculation.
Save your CAD design.
Open CARACAD to view what changes have been made.
To view a Room Response Graph :
Complete an Auralization calculation - Calculations->Auralization.
Click Graph at the bottom of the room response window. Results->Auralization:Room Resp..
You can Print your results for comparison against other designs.
|
|


